


It starts as a small indignity. The cable needs a wiggle. Then it needs to be held at a particular angle. Then it only works if you rest a book on it. Eventually you develop an entire ritual involving a specific cable, a specific socket and a specific position on the bedside table, and you have quietly accepted that this is now normal.
It is not normal, and in the large majority of cases the fix costs nothing at all.
Here is the statistic that surprises people: roughly seven out of ten phone not charging complaints we see are not hardware failures. They are compacted pocket lint. Every day, a phone going in and out of a pocket acts like a small cotton press, packing fibres deeper into the port until the connector physically cannot seat far enough to make contact.
At Fone Doctors we clear these constantly, usually in under five minutes. The purpose of this guide is to help you work out which of the four possible faults you actually have — because the difference between them ranges from free to a genuine board repair.
The Four Things That Actually Fail
Before touching anything, understand what you are diagnosing between.
| Fault | Share of cases we see | Typical symptoms | Typical fix |
|---|---|---|---|
| Blocked port (lint) | Around 60 to 70% | Cable feels loose or will not click in fully, works at an angle, works with one cable but not another | Professional cleaning, often free |
| Worn or damaged port connector | Around 15 to 20% | Intermittent charging, must hold cable in position, charges then stops, visible bent pins | Port or tail flex replacement |
| Battery or charging circuit fault | Around 10% | Charges very slowly, gets hot without gaining charge, stops at a fixed percentage | Battery replacement or board-level repair |
| Cable, plug or accessory fault | Around 5 to 10% | Works with a different cable, works from a different socket | Replace the cable or plug |
The Ten-Minute Home Diagnostic
Work through these in order. Each step eliminates a possibility, and by the end you will know which of the four faults you have.
Step 1: Eliminate the cable and the plug
Cables fail far more often than ports, and they fail invisibly — the break is usually inside the insulation at the stress point near the connector.
- Try a different cable you know works.
- Try a different plug, and a different wall socket.
- Try charging from a computer USB port as a cross-check.
- Check the cable for kinks, heat discolouration, or a connector that feels loose in every device.
If a different cable fixes it, you are done. Replace the cable and use a decent quality one.
Step 2: Restart the phone
Software occasionally holds the charging circuit in a bad state. A forced restart clears it and costs nothing.
- iPhone: press volume up, then volume down, then hold the side button until the Apple logo appears.
- Android: hold power and volume down for 10 to 20 seconds.
Step 3: Look inside the port
This is the step almost nobody does, and it is the one that solves most cases.
Use a bright torch — a second phone's flashlight works well — and look straight into the port. On a clean port you should see the metal contacts and a clear cavity down to the base. On a blocked port you will see a compressed grey or black mat of fibres, which is often mistaken for the bottom of the port itself.
The paperclip test: with the phone powered off, gently insert a straightened paperclip or wooden toothpick until it stops, then compare that depth against a clean phone of the same model. If it stops noticeably short, you have compaction.
Step 4: Assess the movement
Plug the cable in and observe carefully.
- Does it click in firmly and stay? The port body is probably sound.
- Does it feel loose, shallow or wobbly? Either compaction or a worn connector.
- Does charging start and stop as you move it? A worn connector or a damaged tail flex cable.
- Do you have to hold it at an angle? Classic sign of a worn port or partial compaction on one side.
Step 5: Check the charging behaviour itself
- Charges very slowly on a known-good fast charger? Suspect the battery or the charging circuit rather than the port.
- Gets hot but gains little or no charge? Stop, and get it looked at. This can indicate a battery or power management fault and is not something to leave running overnight.
- Charges to a fixed percentage and stops? Usually a battery health issue rather than a port issue.
- Works from a computer but not the mains? Points to a power delivery negotiation problem in the charging circuit.
How To Clean a Charging Port Safely
If step three revealed compaction, this is genuinely something you can attempt yourself — carefully.
What you need
- A wooden or plastic toothpick, or a proper nylon spudger
- A bright torch
- Optional: a can of compressed air held upright, at a distance, in short bursts
The method
- Power the phone off completely. Non-negotiable.
- Shine the torch in and identify where the debris sits.
- Insert the toothpick gently along one side wall, not down the centre. The contacts are on the centre tongue on USB-C and along the base on Lightning, and that is what you are avoiding.
- Scrape gently towards yourself to lift the lint mat out as one piece where possible. Work slowly.
- Repeat from each side. The compacted mass usually comes out in two or three pieces.
- Optional short bursts of compressed air to clear residual fibres. Hold the can upright — tilting it releases liquid propellant into the port, which is an entirely new problem.
- Inspect again, then power on and test.
What never to use
| Do not use | Why |
|---|---|
| Metal pins, needles, safety pins, SIM tools | Metal shorts across live contacts and bends or breaks them. This is the most common way a free clean becomes a paid repair |
| Compressed air held at an angle | Releases liquid propellant directly into the port |
| Water, alcohol or contact cleaner sprays | Liquid into a port with a connected battery risks corrosion and shorting |
| Vacuum cleaners | Static discharge risk to the charging circuit |
| Excessive force of any kind | Snapped contacts and torn flex cables are considerably more expensive than lint |
If you are unsure at any point, stop. Port cleaning at our clinics takes a few minutes and there is no charge for it — that is a far better outcome than a bent contact.
When It Is Not The Port
Two failure modes get misdiagnosed as port faults constantly.
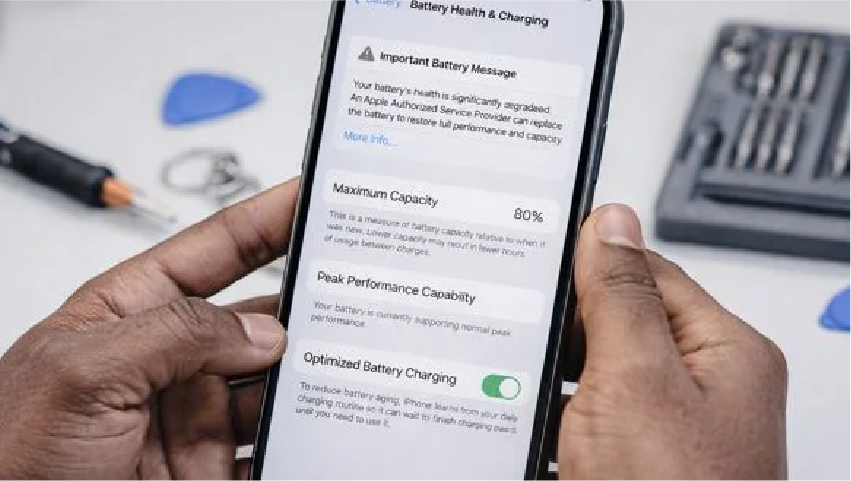
The battery. A cell that has degraded badly will accept charge slowly, run warm while charging, or stop at a fixed percentage well short of full. Check Maximum Capacity or your device's battery health readout before assuming the port is at fault — if it reads below 80 percent, that is very likely your answer.
The charging integrated circuit. This is the board-level component that manages power negotiation between charger and battery. When it fails, the classic signature is a phone that charges from a low-power computer USB port but refuses a fast mains charger, or one that gets hot without gaining charge. This is a micro-soldering repair rather than a parts swap, and it needs a microscope and a hot air station rather than a screwdriver.
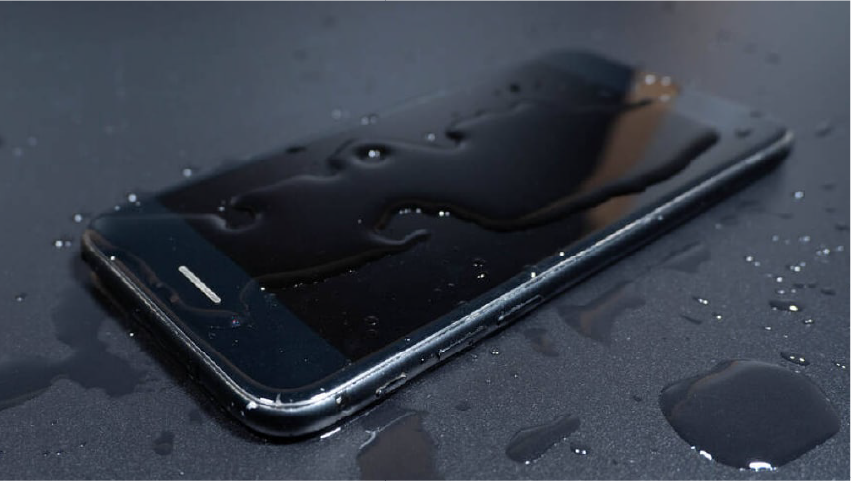
Water exposure is a frequent underlying cause of both. Corrosion on the charging circuit often shows up weeks after a spill that seemed harmless at the time.
If you have worked through the diagnostic and the cause is still unclear, bring the device to our London repair clinics for a free diagnostic. Ten minutes with the right equipment settles definitively whether you are looking at a clean, a port replacement, a battery, or board work.
What A Proper Charging Port Repair Involves
Where the port itself has failed, the repair is more involved than it sounds, because on most modern phones the charging port is not a discrete plug-in module.
- Free diagnostic. Continuity testing on the port contacts, current draw measurement, and inspection of the tail flex under magnification.
- Controlled disassembly. The display or back glass is separated under controlled heat depending on the model, and the battery is isolated first.
- Port assembly removal. On many devices the charging port shares a flex cable with the microphones, antenna connections and, on some models, the haptic engine — so the whole assembly is replaced together.
- Micro-soldering where required. On models where the port is soldered directly to the logic board, the old port is removed under a microscope with hot air, the pads are cleaned and reworked, and a new port is reflowed into place. This is genuine board-level work.
- Full function testing. Wired charging at full rated speed, data transfer, microphone function, and antenna performance — because a poorly fitted port assembly degrades call quality in ways that are not obvious until a week later.
- Reseal and gasket renewal where the model supports it.
Our charging port repair in London covers all of the above, typically in 45 to 90 minutes depending on the model, with free diagnostics, a fixed price before work begins, and a twelve-month warranty.
Preventing It Happening Again
Charging port problems are unusually preventable.
- Clean the port every few months with a torch and a toothpick, before compaction sets. Thirty seconds, entirely free.
- Consider a port dust plug if you carry the phone in a pocket with tissues, or work in a dusty environment.
- Do not use the phone while it is charging on a short cable. The lateral strain on the connector is what wears the contacts.
- Unplug by the connector, never by pulling the cable.
- Use quality cables. Cheap connectors are dimensionally out of tolerance and wear the port far faster than they wear themselves.
- Switch to wireless charging as your default if your phone supports it, and keep the wired port for when you need speed. The port only wears when it is used.
Related repair guides
Slow charging with a healthy port is often the battery — see phone battery health explained. If liquid was involved, follow the first-hour water damage checklist first.
Key Takeaways
- Around seven in ten charging faults are compacted pocket lint, and clearing it costs nothing.
- Always eliminate the cable and plug first — cables fail invisibly at the stress point.
- Inspect the port with a torch and compare insertion depth against a clean device.
- Clean with wood or plastic only. Metal tools cause the most expensive damage in this category.
- Slow charging, heat without charge, or a fixed cut-off percentage point to the battery or charging circuit, not the port.
- A phone that gets hot while charging should be unplugged and checked, not left overnight.
Frequently asked questions
If a known-good cable and plug do not work, the most likely cause is compacted lint preventing the connector from seating fully. Inspect the port with a torch. If the port is clear, suspect a worn port connector, a battery fault, or a charging circuit failure — a free diagnostic will distinguish between them.
Share with your community
Get in touch
Questions about this repair? Send a message or book a slot at a London clinic.